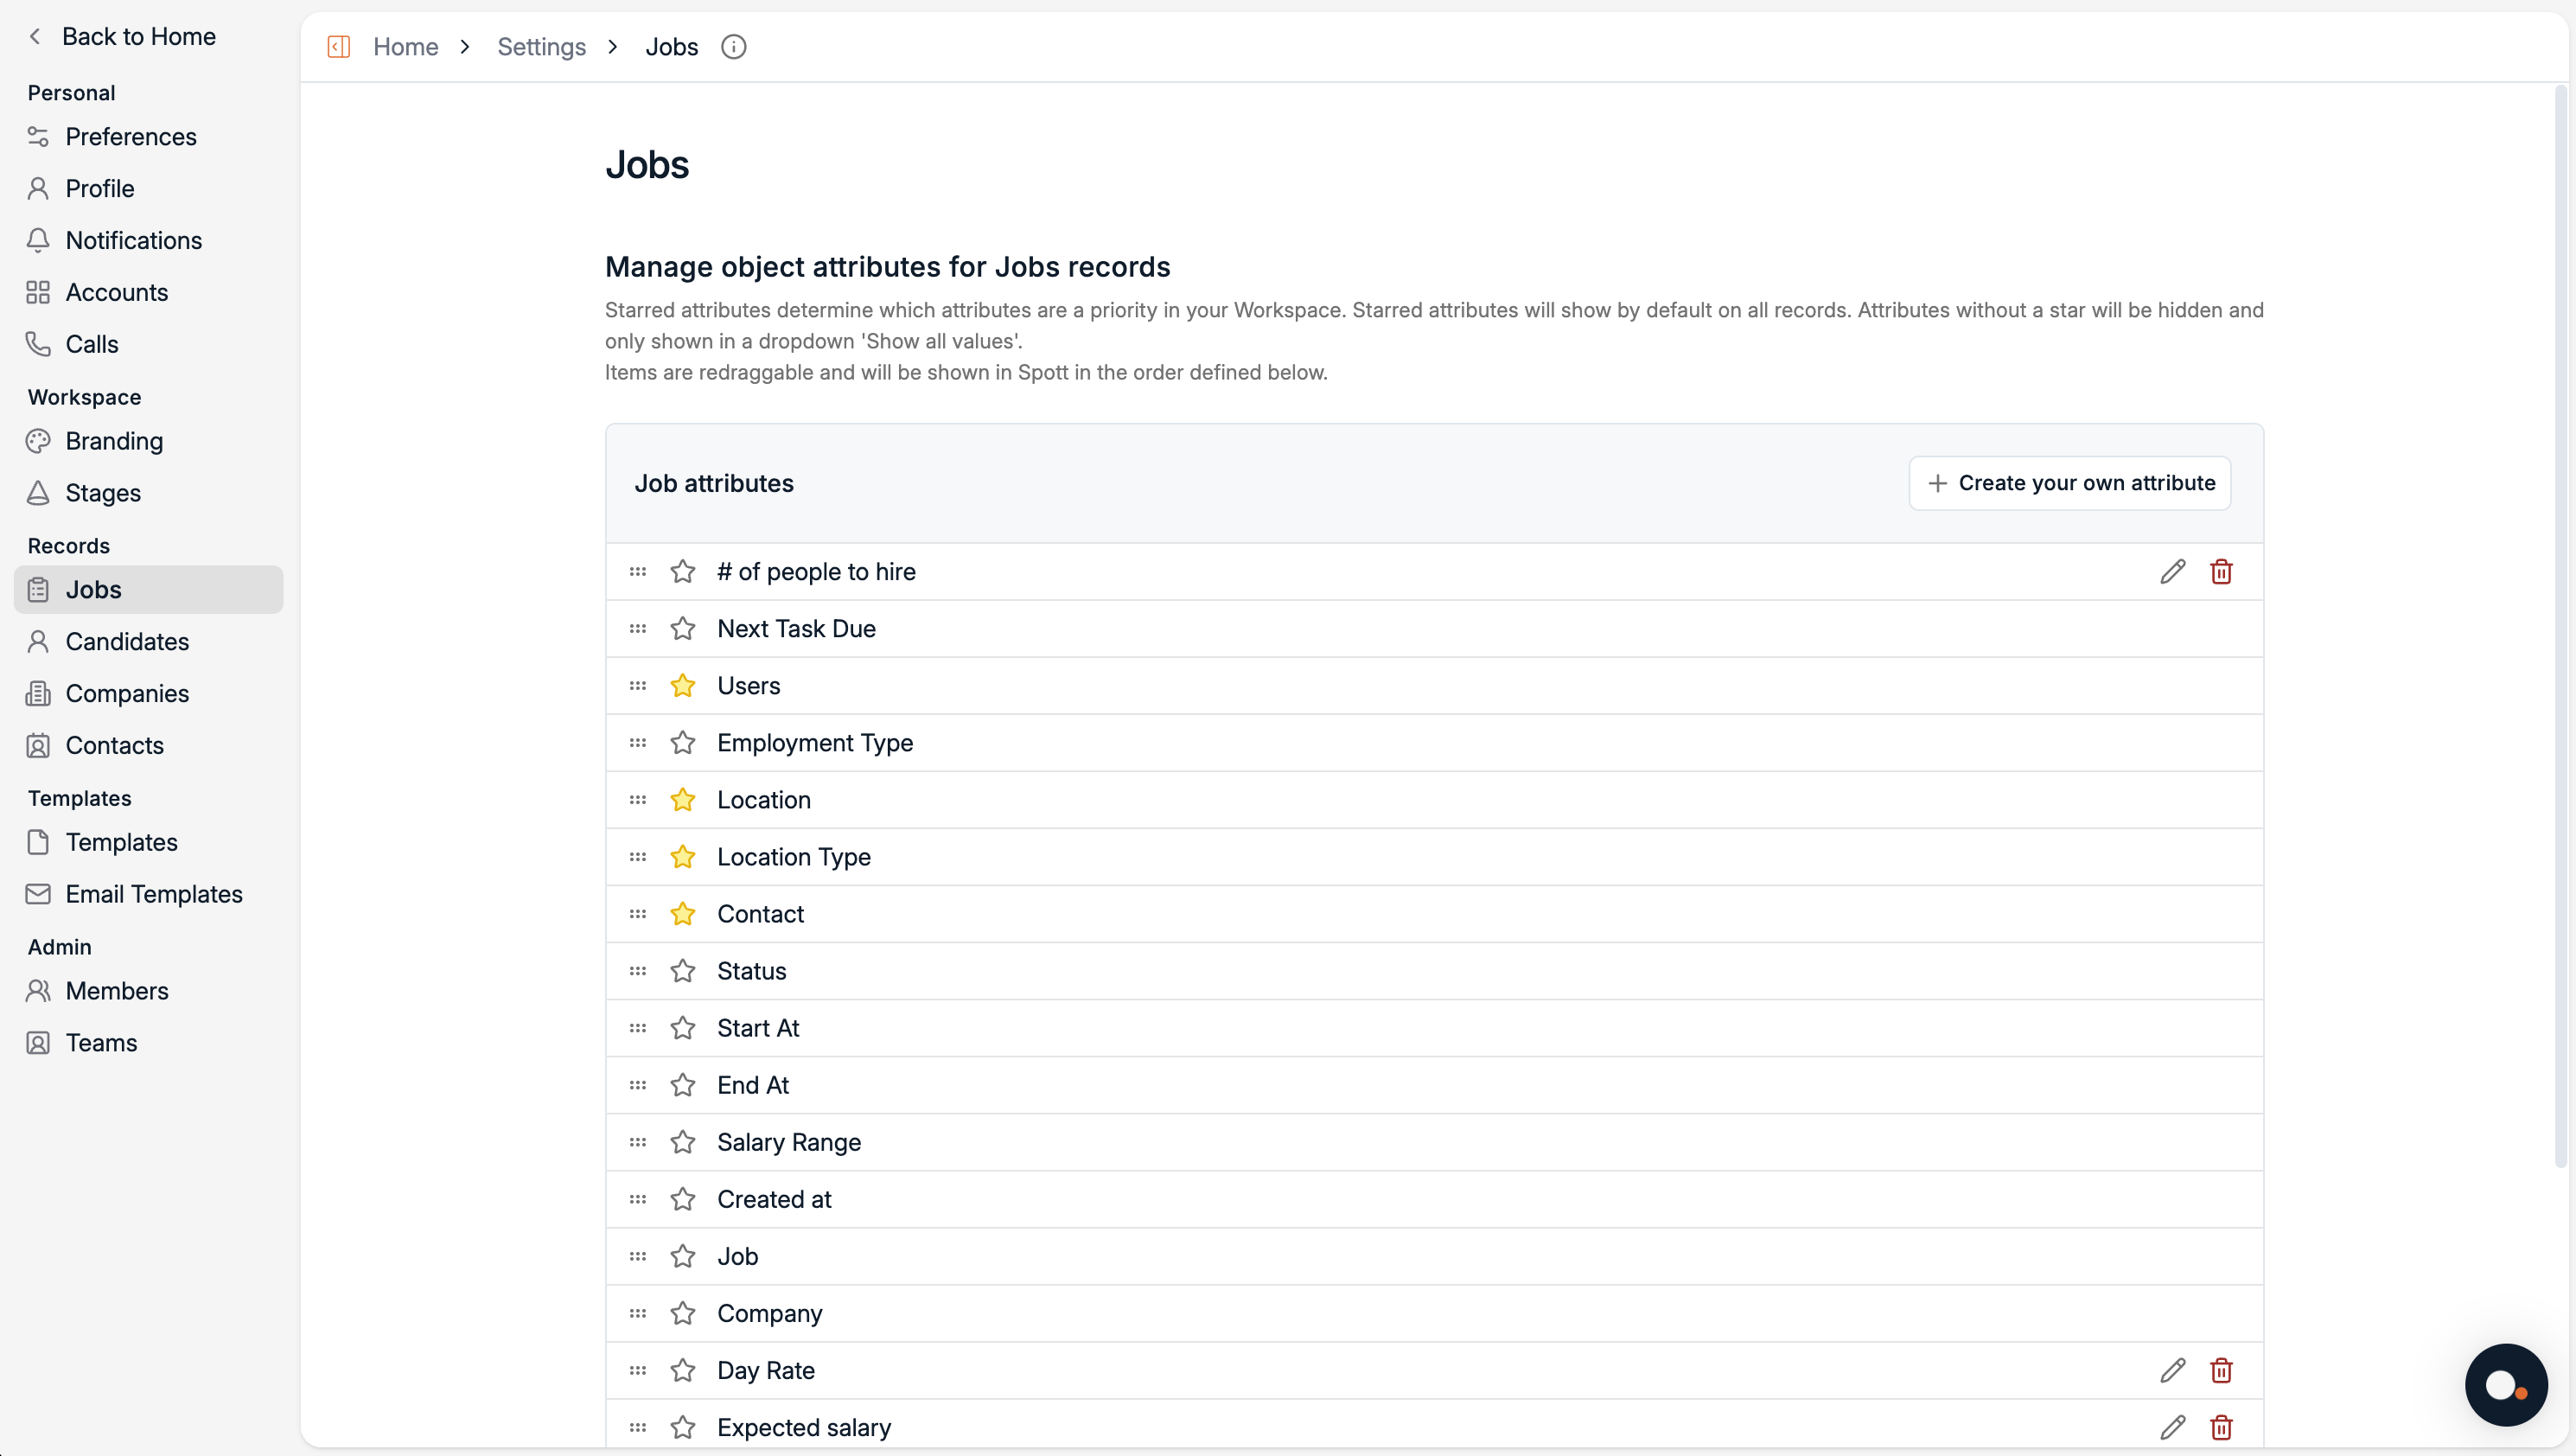
Starred attributes determine which data fields are visible by default in your workspace.
Use stars to highlight what matters most to your team and keep your interface clean.
Use stars to highlight what matters most to your team and keep your interface clean.
1
Access the attributes settings
- Go to Settings in the left sidebar.
- Under Records, select the entity you want to customize — Jobs, Candidates, Companies, or Contacts.
-
You’ll land on the Attributes section.
2
Understanding starred attributes
- ⭐ Starred attributes are prioritized fields — they appear by default on every record view in your workspace.
- ⚪ Unstarred attributes remain hidden until you click Show all values on a record.
This allows each workspace to stay clean and focused by only showing the most relevant fields first.
3
Reorder and customize your attributes
- Drag and drop attributes in the list to define their display order.
- This order determines how they appear in Spott across record detail views.
- To star or unstar an attribute, click the ⭐ icon next to it.
You can tailor your setup per record type — for example:
- Jobs: Location, Employment Type, Contact
- Candidates: Sector, Email, Location
- Companies: Industry, Size, Key Contact
- Contacts: Company, Email, Role
4
Create or edit custom attributes
- Click Create your own attribute to add new custom fields.
- You can rename, reorder, star, or delete them anytime.
Removing an attribute deletes it from all records — make sure it’s not in use before doing so.
Starred attributes apply workspace-wide, so all users share the same prioritized field view. Adjusting them helps ensure everyone focuses on the same key information.