You can quickly navigate to this page using
Learn more about all shortcuts here.
G then A.Learn more about all shortcuts here.
1
Open the Candidates view
From the left-hand navigation bar, go to Candidates to open your full candidate list.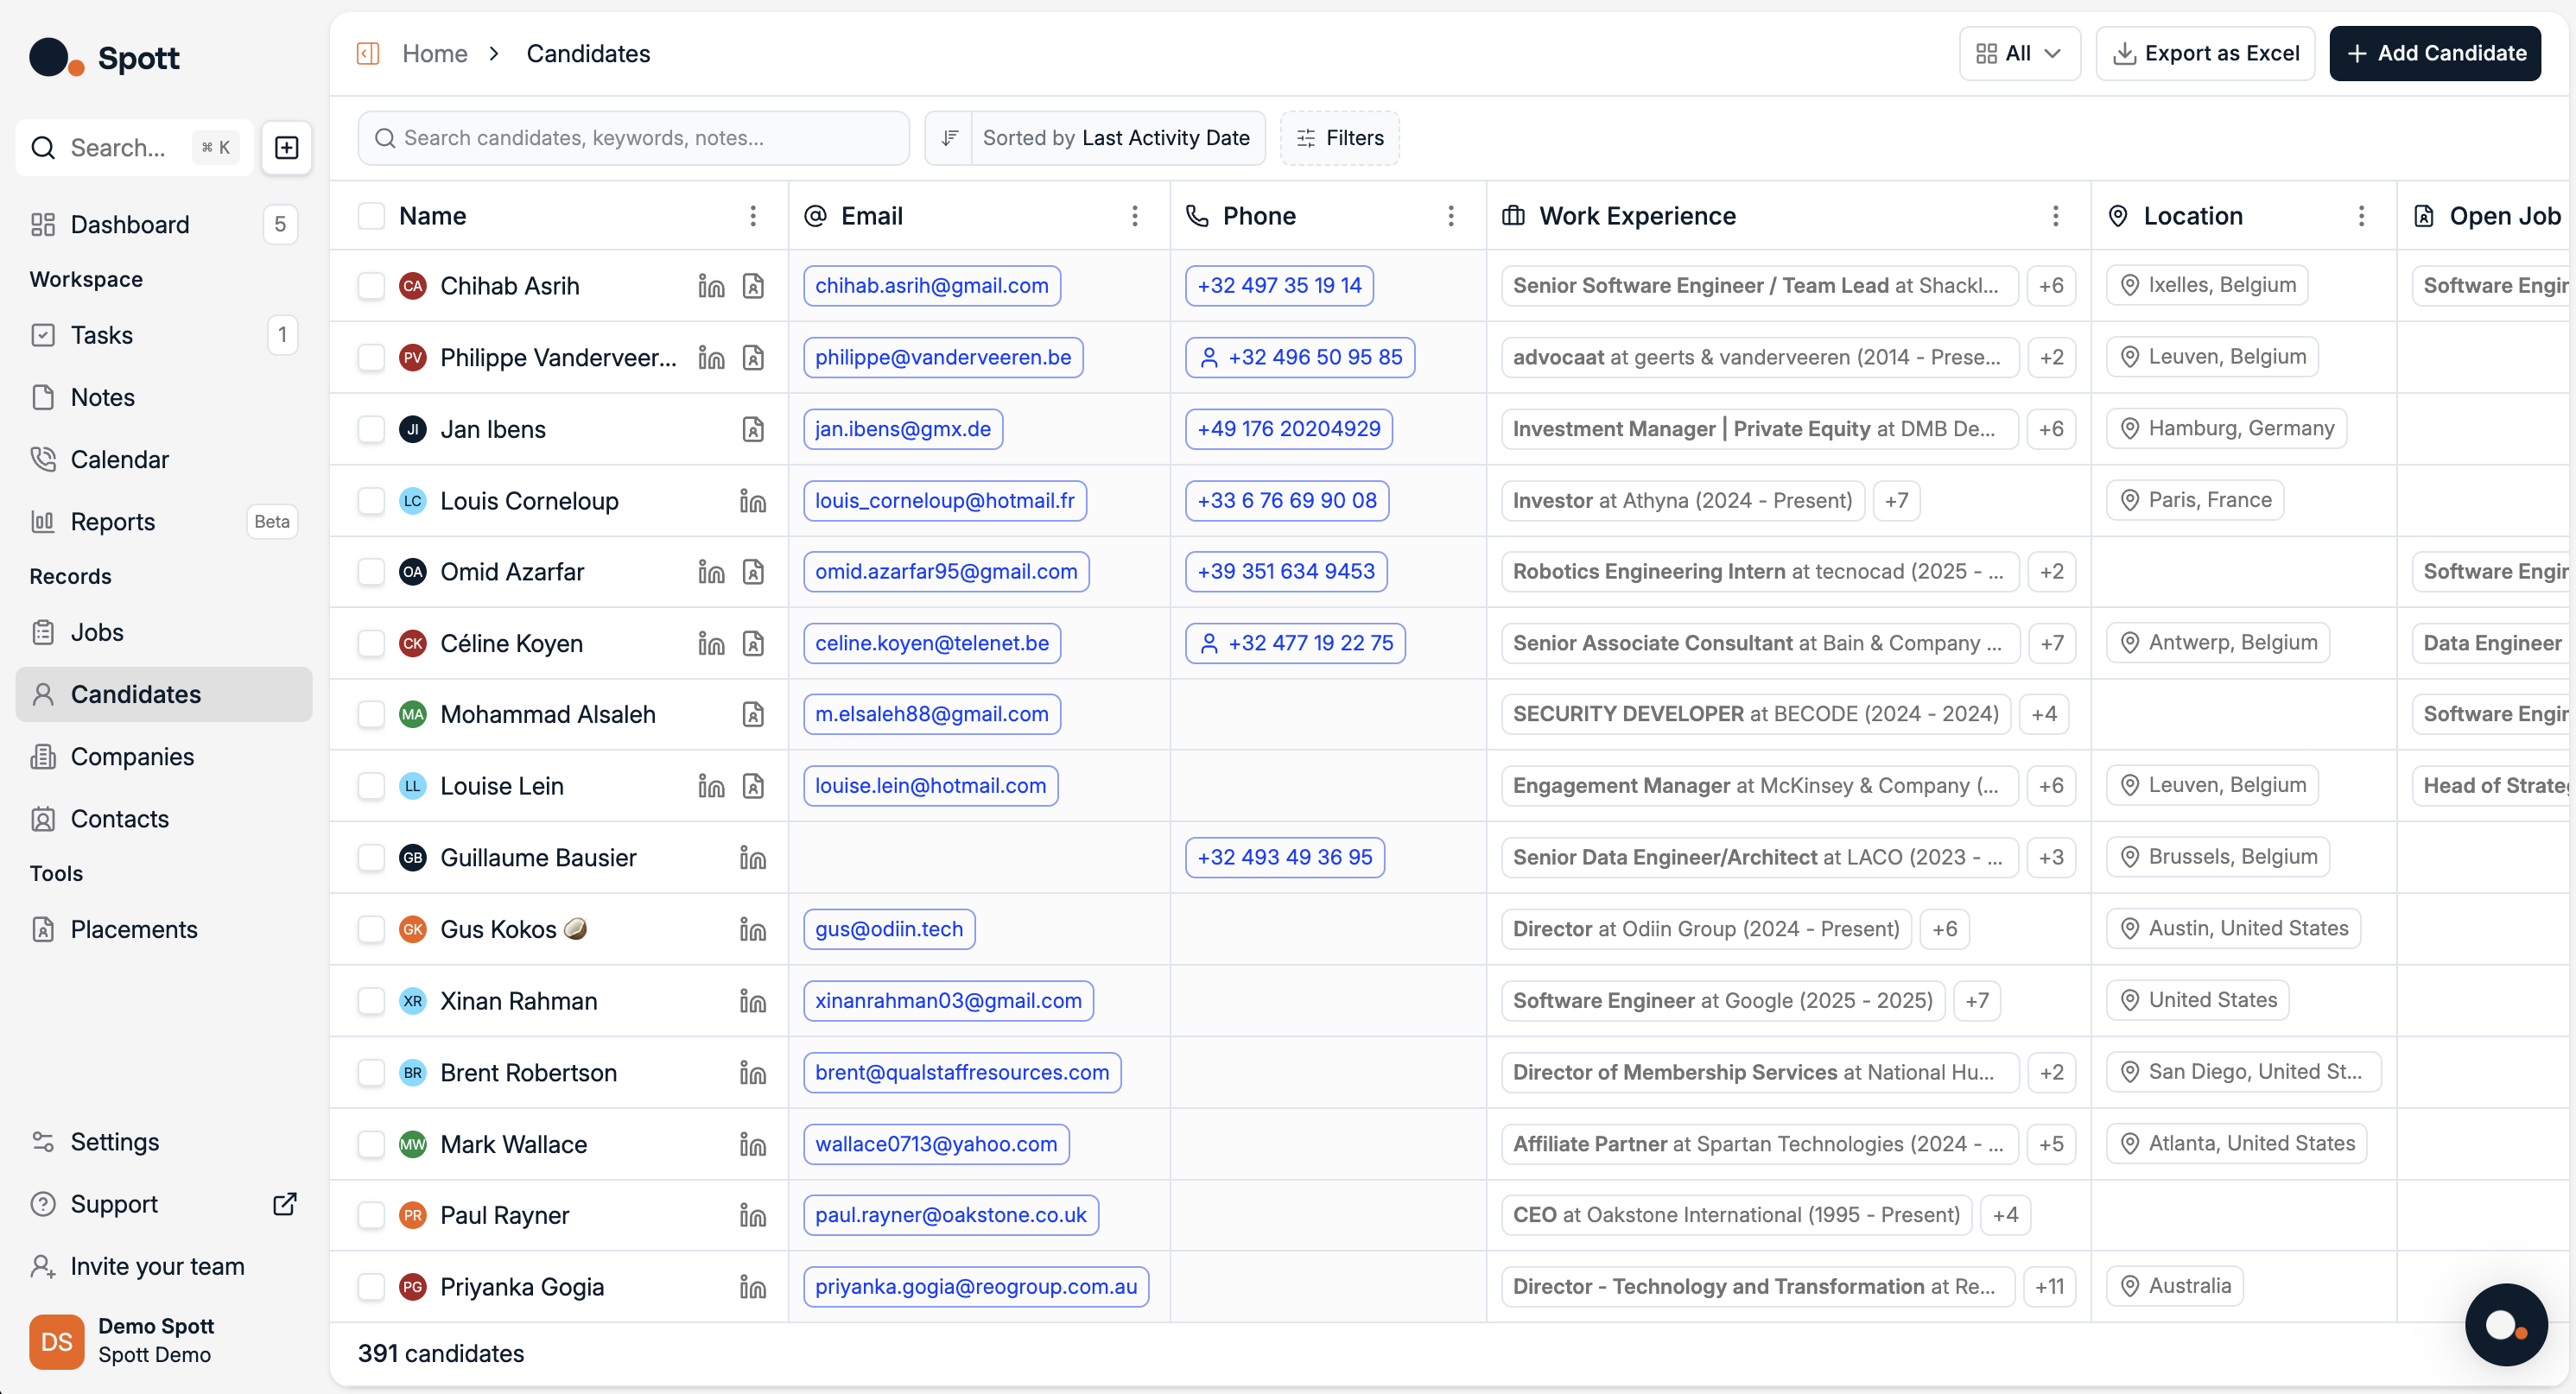
- All candidates in your database
- Default attributes (columns) such as candidate status
- Comments linked directly to each candidate
2
Understand default attributes
By default, Spott includes several attributes for every candidate, such as:
- Status – Active, Passive, Not Actively Looking
- Other built-in fields available in your database
Default attributes cannot be removed but can be rearranged in your table view.
3
Add a new column
- Scroll to the far right of the candidate table.
-
Click Add Column.
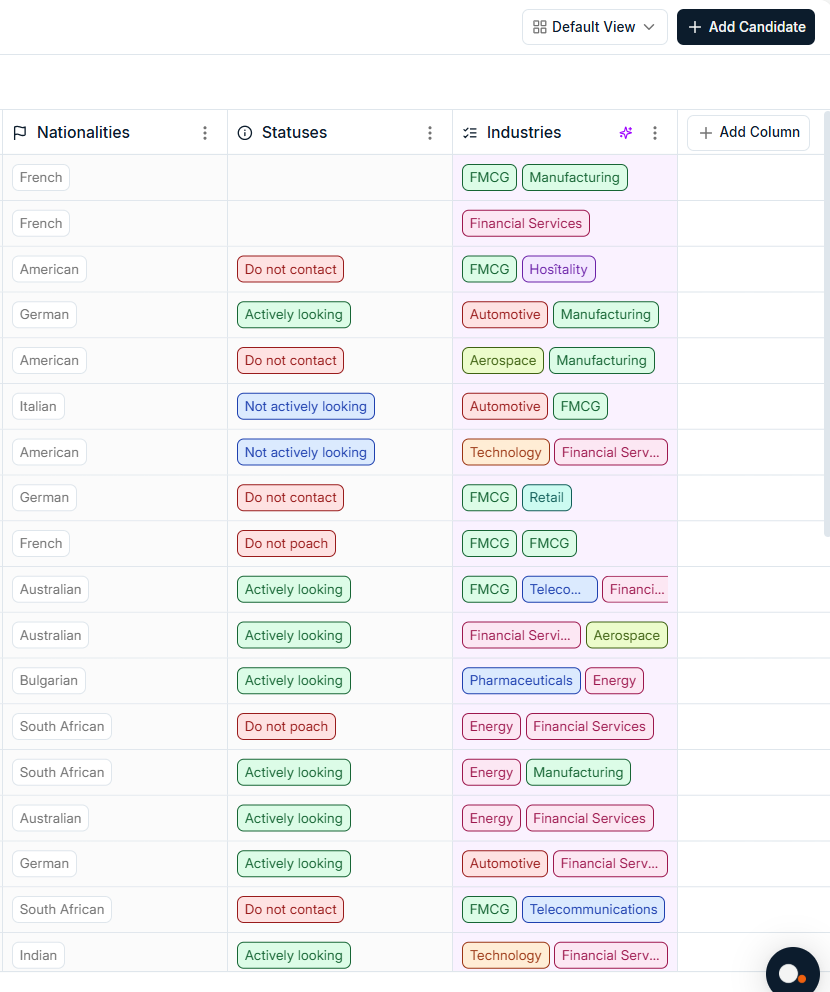
- All existing attributes you can display
- An option to create a completely new attribute
4
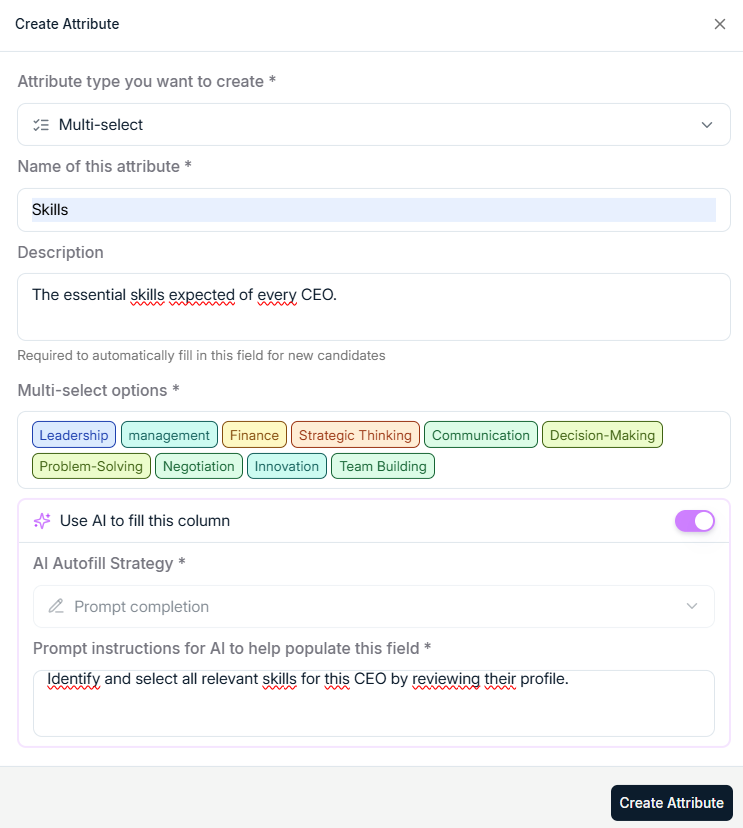
Create custom attributes
When adding a new attribute, choose the data type:
- Attribute only – For preset dropdown values
- Text only – For free text input
- Number only – For numeric values
- Date only – For date fields (e.g. availability date)
-
Multiple choice – For selecting one or more options from a list
5
Use and manage custom attributes
- Fill in attribute values directly in the candidate table or in the candidate’s profile view.
- Reorder columns by dragging them to a new position.
- Hide or show attributes as needed to keep your table organized.
- Use AI assistance to automatically link attributes to the right candidates based on profile content, notes, and CV data.
AI linking can speed up data entry by pre-filling attribute values where matches are detected. You can review and approve suggestions before they are saved.
Customizing candidate profiles helps you capture unique data points relevant to your recruitment process, making searches and filters more effective.